Pages

Thursday, January 29, 2015

Do you want to know what is comoing?

This is the list that the Technique Tuesday's will come from. They will not be in a specific order.    If you can't download this list email me if you want it.  There are many things that can be done for scrapbook pages and for cards and for things on the wall or desk.  Attention to detail, having patience, doing it over and over and be willing to make mistakes are a few of the things that will make it look good or look great.  Keep trying and see what you can do with it.  I find it fun to take a paper packet, a stamp set or a technique and push it to the limit and see how many different ways and different things I can do with it. 


Foundation Basics
Album
Page Protectors – Flip Flaps
Memorabilia
Basics (pencil, eraser, ruler, scissors)

Adhesives
Adhesive tape/dots
Adhesive remover
Glues
Mod Podge
Glue pad
Xyron
Zots/dots

Stamps
Acrylic, blocks
Cleaning
Rubber stamps

Paper
Cardstock
B & T
Kraft Paper
Glitter papers
Vellum

Cutting- making holes
Paper trimmer
Scissors
Rotary cutters
Scoreboard
Big Kick – embossing/die cut
Punches
Stitching – Paper piercing
Utility knife

Inks
(use pads, use cover, brush, stamps,
Sponge, dauber, use pad)
Water base
Pigment ink
Alcohol
Glue ink pads
Versamark
StazOn
Embossing powder
Brayers
Markers

Embellishments
Washi tape, shimmer trim
Twine etc
Ribbon (plain and bows)
Bling (sequins, enamel, sparkle
Gems, dots)
Brads
Dimensional elements
Eyelets

Journaling
Paper
Computer
Marker
Doodling
Vellum
Calligraphy

Cricut
Die cut type
Templates
3-deminsional
Pockets
Tags

Distressing
Scissors – tools
Dauber, sponges
Wet paper
Tissue- wax paper
Water mist
Sandpaper
Stipple brush
Templates
Empressor tool –score board

Besides ink
Glitter
Chalk
Liquid glass
Applique/flocking

Stamping techniques
Ink
Generation 1st, 2nd, 3rd
Kiss, Kiss and twist
Markers
Bleach
Vellum
Resist embossing
Masking
Chalk popping
Rock & roll
Stamp techniques cont
Block
Make own pad
Use household items
Window pane - tiling
Reverse stamping

Using Paper/ribbon
Balloon
Bleach
Shaving cream
Stamp on ribbon
Bubbles
Tissue
Water color
Make own background
Random stamp
Border

Misc
Using liquid glass
Put things in between pages

Tuesday, January 27, 2015

Rather than put scraps away, I used them!


I had just finished posting some of the cards that I was using scraps on.  I then did the Heartstring Workshop on the Go cards.  Rather than putting the scraps away and wondering what to do with them, I made these cute cards.  I used some of the Stamp of the Months and some older stamps but had fun.  I also did some dry embossing.  It made me feel better putting cards away rather than building my scrap pile.  When you finish a project, leave some time to keep going and using up the scraps on pages or cards.  You may surprise yourself at what you can do!

Oraganization starts where you are!

Yesterday I posted my first "Technique Tuesday".  I have been going through my old files and organizing what I want to post each Tuesday.  I haven't been able to figure out how to print my blogposts - maybe you know how or you don't know either.  It got me to thinking that as we go along, you might want to save some or all of the ideas.  This is the time to get paper and start each page with a topic - like "Albums" for today.  Write down what you find important and the date you write it down. It is amazing how fast "fashion" changes as well as products that are available.   You may already have things on file that you can add to.  I welcome you to post and share what you are doing or have done.

I find that I work better in ring binder with Post It Durable Filing tabs rather than file folders.  I think it is because so often in file folders things slip out or don't get put back in.  I can go back and find things easier by looking at the tabs in the ring binder.  I try different techniques that I see and sometimes adhere the samples to the page.  I can then see at a glace if it worked or if I needed to do something else. 

Starting or using a binder or file folder can help get your creative "juices" going when you have a desert time.  I have binders for previous projects - that will be an idea for some technique Tuesday - and I have "business ideas" as well.  Good luck organizing and creating and keeping the memories you love.

Monday, January 26, 2015

Technique Tuesdays

Each Tuesday I will share from a variety of "techniques" that make our scrapbooking experience wonderful.  It may seem strange but the first thing I am starting with is the albums and pages themselves.  Often we can make pages but they never get photos on them nor get into an album.

First you need Memory Protectors.  Close To My Heart had the regular top load and new side load.  there are ones for 6 vertical or 6 horizontal pockets as well as a variety of designs for Picture My Life with combination 3x4 and 4x6-6x4 pockets.

There are My Legacy Faux Leather albums which hold 12 x 12 Memory Protector pages.  They start out with 1/2 " posts and are expandable in 1" (1011) increments (3 for $2.50.  These albums are Outdoor Denim (z1346) and Dark Chocolate (z1342) and are $29.95.

The February Constant Campaign is the Album Allure.  During the month of February, when you purchase 1 of the alluring coated canvas albums, you will be eligible to receive a second album from these three colors and 2 designs at half price.  The first one is $34.95 and the second is half of that or a savings of $17.
The colors are: Lagoon Chevron, ruby Floral and Black. Inside they have MDF (medium-density fibreboard) core which makes them sturdy and light.  They come in D-ring and non-expandable steel posts. The D-ring are great for the Picture My Life and won't let the pages 'tent'.  D-ring also work well with the page protectors without a seam.   Both D-ring and post are 1 1/2" and will hold from 25-50 pages.  There are Spine Expander (z4120) which are 10 fold-able plastic expanders to help with a smaller number of pages or if you have lots of embellishments on it. 

D-ring Lagoon Chevron (z2092), Ruby Floral (z2091) and Black (z3034) are perfect for you if you like to move pages around as you are working on them.  The New steel posts have a half ring so there is no screwdrivers needed to get the posts undone.  also the flap is magnetic and will stick down.  These posts albums are not expandable but 1 1/2" is a good size for an album or theme.  Post albums Lagoon Chevron (z2092), Ruby Floral (z2093) and Black (z2094) are just the thing for your next project!

In February, you can get one of these last mention 3 in either style and then the second one is 1/2 off.  this goes for as many albums as you want to buy.  You can go to http://barbarapagekell.ctmh.com, Shop button and then Albums and Accessories clicking on Albums to see a bigger picture of them.  It may seem soon to talk about it but next Sunday is already February 1.  Get your pages together and see how many albums you want to fill!

Cricut® Artfully Sent: Scene Function

Friday, January 23, 2015

Charms to cards

Close To My Heart has great embellishments that you can use.  Sometimes you can choose to use things in new ways  Base & Bling is about Jewelry.  You can use the charms on cards as well.  I chose the dreamer charms of a bird and feathers with some previous paper and present stamps.  I punched the card and tied the charm on with ribbon.  Half are faux antiqued silver with the other faux antiqued gold.  These charms helped the cards take flight!


Do you have your cards for Valentine's Day?

In the Close To My Heart Seasonal Expressions there is a Workshop on the Go Cardmaking with the paper Heartstings.  You make 15 cards - 5 each of three different designs.  You get the paper for the project, the cards and envelops, you get an exclusive stamp set and the "bling" needed for the instructions that are provided.  Close To My Heart has easy instructions and photos to help you do your best. In a short time your project is finished and you have some great cards to send.


Saver vs Pitcher - Which are you?

I am a saver.  I save a lot of stuff.  In the move to where we are I have found the beginnings of cards. When my saving pile gets too big, I go into a making frenzy.  I have made 85 cards in the last few days that were halfway started.  I enjoy going through scraps and making pages and cards.  See what you think of some of the creations.


Monday, January 19, 2015

Create a Mini Album in January


This is a new year.  It will go fast.  One way to remember what has happened is to journal. I have chosen a new method to mark my monthly highlights.  I decided to use the January National Papercrafting Month Kit.  I used the My Creation Kraft Mini book and the Year>>Noted Paper to create my new year's book.

Until January 31, you can get the paper kit with a C size stamp set, stickers, cardstock and Background and Texture paper for $5 when you purchase $50.  By the way you can also get the Stamp of the Month with a $50 purchase!  For $10 you can get the kit and the My Creation Kraft Mini book.  

I put the Mini book and the paper kit together but there is much more you can use the kit for.   You can use this paper with the Picture My Life or regular 12 x 12 scrapbook pages. I used the stamp set that came with the kit as well as other Close To My Heart Stamps.   I used the Stitch Guide and Foam Mat as well as the Cricut Artfully Set - Pocket Cards.   Take a look at the pages.  You can add photos.  I am going to take the end day of each month and record the highlights in journaling and photos.


Wednesday, January 7, 2015

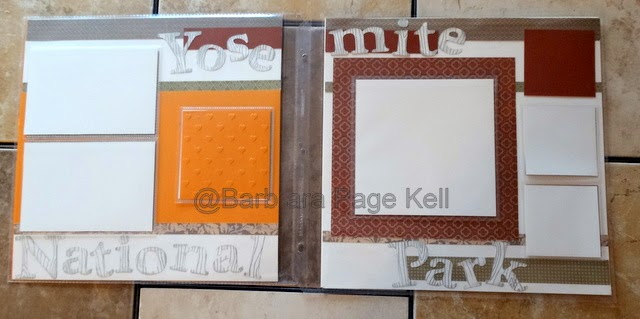
Here is another layout using the flip flaps.  This take a whole packet of Close To My Heart paper with neutral base pages.
 This is the title page.  I used the Close To My Heart Artfully sent Pocket cards on the back of the flip flaps.  I stamped underneath the flip flaps but you can also put photos there as well.


I put the layout with the flip flaps down o and the flaps open on each of the 4 double layouts.  If you have any questions you can ask.  I have the cutting and pasting directions of you wish for both layouts. 

Tuesday, January 6, 2015

Flip Flaps


I have designed these pages for use with Close To My Heart Flip Flaps.  They come in different sizes. Z1747 Small Assortment has 4 each of 2x2, 3x3, 3x4 and 4x4.  Z1726 has 10 - 6x6.  Z4114 is 15 - 4x6 and there are an assortment Z1325 4 – 6x12, 2- 4x12 and 2 - 8x12.   These pages are designed for regular photos or once put in Memory Protectors, you can add the flip flaps to the outside.  It helps that you know the order of your pages because once adhered on, they stay there.  Close to My Heart has side loading Memory protectors as well as top loading. 

Why use Flip Flaps?  The advantage is that if you have a lot of pictures, you don’t wind up with a lot of pages. Also you can have journaling - even extensive stories that can be on the back side of the flip flaps.  You can put 2 photos in the flip flap as well as under the spot of the flip flap.  I have put paper in the photo mats but if you are using the full size pictures, you don’t need to cut the paper unless you are journaling or the photos is smaller in size.  Also if you find photos later after you have done pages, you can add them by putting the flip flap on the page protector.  

This 4 double page layout is made with ½ packet from Close to My Heart called Brushed.   You will also need 8 neutral pages as base pages and a few more for circuiting and as photo mats.  You can have 4 more pages if you repeat these 4 again. I have shown what it looks like first with the flip flaps down and the second one shows them "flipped".  If you are interested in the directions for how to cut this out, contact me and I will send you the directions for cutting and pasting.