Monday, December 12, 2022

Christmas Cards

 Because life happens, I wasn't able to do the November Classes.  We are doing the Christmas classes on the 12, 13 and 14 of December.  January is planned for January 23, 24, 25.  There will be lots of snowflakes and snow people on the cards and you can use whatever sentiments you wish.


Here are the Christmas Cards:


Monday, October 3, 2022

Christmas cards

This is the new Picture This Christmas Card special.  There are 10 cards and envelopes and you can get the added thin cuts to make the envelopes special.  You can even use acetate and make the whole card a shaker card!.  Check out all the options on the website. The die cuts that come with this card kit make it easy and fun!  Get a jump start on Christmas card making.  
 

October Card class

 Close to my Heart has great card workshops with each paper packet.  Usually I make the 16 cards and pick 1 to use in the card class.  This time I did one of each design and the class can choose to make 1 of the 4 designs.  We will also do an interactive card.  I am looking forward to some great workshops this fall.

This is the Workshop Wow - Flower Shoppe which is available now if you want to make all the different cards.  

This is the Crisp Air Cardmaking workshop which is still available as if this posting.

There are some really cool stamps that fill the whole card.  This is possible to do will with the Misti platform.  The pumpkins were from a while ago and the distressing oxide inks really make this work well.

This is from the catalog that just went live October 1.  It is the Christmas Story cardmaking workshop.  It is versatile in that you can do sentiments that are anytime cards to send at this season.  I really love all the thin cuts that came with this card kit.

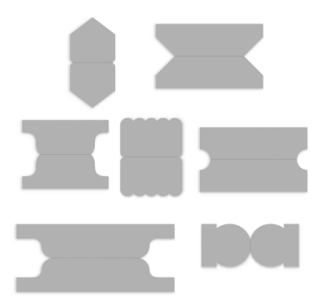
There are some really interesting interactive cards in the Core Catalog.  On page 42-43 you can find : Another candle, You deserve it all and the Pull tab tin cut needed to make the cards interactive.


Monday, September 19, 2022

Backyard Bliss Plus

September ends the current catalog.  Our group wanted to do the Backyard Bliss workshop but also liked the single page at the beginning of that section.  We purchased the Backyard Bliss workshop, the paper plus sticker sheet and the Mix-ins.  

Here is the original workshop 3 double page layouts.


Here is a double page layout that is scrap lifted from the catalog.


And here are the other 2 pages we did based on some previous workshops.


Originally I was not going to embellish the pages we added.  I am not sure what photos I want to use with them.  What I did was embellish the pages and save the scraps of paper and the extra stickers, embellishments and die cuts to use later.  I won't make extra pages but I will make PML cards for the 1/2 sheets for the extra photos I might use.  I will also use various flip flaps if I want to add journaling or photos.  There is the one page with 6 circles - I plan to just cut the photos in the 2 3/4 inch circles to put on there.  I thought it might be fun to write on the outside of the white square the journaling that I want to put on the page.

If this is a packet you might like get the paper before it is gone.  There is also a couple of stamp sets you could use with these pages.  Also if you like the extra pages, I could send you the instructions.  I thought about making cards with the extra pieces but decided to wait and use them for more pages later.  


Friday, September 2, 2022

Flash sale today through Monday

 Close To My Heart will do a Flash Sale from Friday Sept 2, 2022 3pm (mdt) until 11:59 pm (Mdt) Monday Sept 5 .  Check out my website for retired and new products up to 60% off.  They are available for as long a supply lasts.   Sale prices don't apply to CTMH cash or 50% rewards.  If you use those, the items will be charged at full retail prices.  

Got to my website  and visit under Promotions to find the sale.  

 Also note that I am doing a card class at my home on Sept 13 starting at 10am.  Sign up before Sept 10 so that I can have enough things cut for each person.  


Tuesday, August 30, 2022

End of "big" Yearly catalog

 August 2022 is almost done.  So is the opportunity to get things from this catalog.  

I take a lot of photos.  My youngest is in the 30 ish range and the other 2 are older.  I haven't started their books.  I have everyone's preschool photos and what they made.  I have their grade school photos and what they made.  I have photos and more photos of high school collage and their marriage and grandkids.  

The catalog that is done at the end of August had a paper set "As You Grow".  I got a packet when the catalog came out and didn't know if I should do 3 books or 1 book.  Who would look at it?  How would I share it? 

Since the paper "As you grow" will be gone in a few days, I decided to get the workshop done and see if I needed to get more while it was still here. I love the layouts.  I have decided to do all 3 at once and use flip flaps to put photos one top of each other.  It will be hard to choose just a few to put in the scrapbook but at least I now have a starting point.  I modified the workshop because of doing all 3.  Here it is. 

Before the catalog is gone, look through it and see what "must have's" are there.  Make sure you don't miss out on something you might regret later.  There have been a few stamp sets that I really regret not getting. Let me know if there is something that you are thinking about and want to bounce ideas off of.  I am there to talk and muddle through your process of getting the photos and papers together.


Wednesday, August 24, 2022

Beach Party Launch event

 Beach Party is available now online in the July - September catalog.  The 3 -2 page layouts and the 2 cards are not online.  That is because they are part of the "Launch" event.  A month before the catalog goes live, Makers are able to order a kit and do it online.  I wasn't here when the launch happened so I have just done it now.  There is a VIP program where you can get credit for you purchases and a discount by being part of the VIP program.  The next step is to be a Maker which has a fee and you have to have $300 sold in a quarter to remain active.  You get discounts as well.  If you are thinking about becoming a maker, please message me.  If you would become my downline, I would help you with designs and travel the corporate website.  It is a great adventure and lots of fun.  


Tuesday, August 9, 2022

What is coming up in September and October?


September 13 - Tuesday at 10am We will have the next card class.  If you can't make that time, let me know.  This is a hold over from the August card buffet because using the Misti platform will help everyone.  I am still doing the stamping on the Thin cuts but I am expanding the techniques and how much you can learn to do.


Would anyone be interested in a possible Crop at my house September 10?  The craft room would be open from 10am - 4am.  I would have some "technique events" scheduled throughout the day and snacks.  You can bring your kits, papers, projects and other things you have been meaning to do or use and you can do what you like.  I will have some notebooks that have the different workshop guides that you can use here.  Let me know what you are looking for and I can have somethings marked for you. I will provide lunch and you can use any of my stamps, inks, etc.  $15 if you sign up by Sept 1 and $20 after that.

Fa-BOO-lous Halloween is here.  Check out my website promotions.  We can do this together online or on Zoom.  Let me know if you want to join in the Fa-BOO-lous fun.


Coming soon is National Stamping Day Card Creativity packet.  We can do this kit in person or zoom.  You would need to purchase it -when it comes available - and precut before we meet.  If you are interest let me know at: revskell@gmail.com

Monday, June 20, 2022

Hope and Kindness

 Hope and Kindness is still available with the workshop kids for cards and albums as well as each individual pieces.  Here are the 6 sets of 2 pages for the albums with plenty of things left over to make PML cards for the 1/2 page protectors as well as more pages.  Check out https://barbarapagekell.closetomyheart.com/retail/search.aspx?searchvalue=hope+and+kindness to get your own materials.


These pages are not for beginners.  They really come together well but it does take some work. 


Monday, May 16, 2022

Holographic paper, Moon dust glitter gel, dioxide inks, diamond stickles, full card size thin cuts and paper

 Usually I am making 1 sample and making sure I can cut 6 - 10 cards from the same paper.  I have had holographic paper and the full card size thin cuts for a while.  I haven't really used them.  I decided to see how many different ways I could use these.  One of my adult children wanted sympathy cards so I went to town and "played".  Here is the results and some things I found out about it.

I like the think cut.  I used Holographic paper underneath it.  What I discovered is that I covered most of the card up with saying and image and therefore I am not sure that it is a good use of the holographic paper. I think using the Moon Dust for "shiny" might be better or just filling the holes with diamond stickles.  
The yellow top left is the Moon dust and dioxide inks.  The one to it's right is holographic paper and the bottom one was plain cardstock and no shiny things at all. I had been using so much shiny stuff I thought I would see if just "plain" worked.  This all card think cut with the flowers really didn't matter so much if it was covered up as the openings were larger to see the holographic paper and Moon dust underneath.  I used the moon dust on the yellow right on the cardstock.  I did that on several cards and realized that sometimes it wound up on the back of the card . I notice now that the one edge of the thin cut isn't stuck down.  I used the liquid tombow and then put a large acrylic block on top.  Adhering to the holographic paper and glitter gel need the liquid and a bit of time to make it stick good.  I think even if it might add a card layer, I would do the glitter gel on a separate piece and glue that to the card rather than put it right on the card.  

I had used the holographic paper underneath the butterflies. I really like it so I did all 3 that way.  I like how the butterflies stick up but found it difficult to figure out how to get the sentiments on it and almost just decided to put the sentiment on the inside. 

There were 2 thin cuts - leaves - that popped out and the one with a place to stamp a saying on it.  
I had some A size stamps that I hadn't used and decided to use the dragonfly and swallow on these as they were smaller.  The bottom card I used the diamond stickles on the buds and outline and used another thin cut for the sentiment in the middle.  The leaves didn't really work well to use the Moon Dust but the Diamond stickles were great to use. 

I will use the holographic paper again on the thin cut card fronts that are more open and you can see it better.  I will use the glitter gel as an all over background.  Until this point I only used the glitter gel with the dioxide inks for stencils.  For some reason I find that using shimmer brush, stickles, glitter gel, glitter paper and holographic paper seem to dress up the card and make it really pop. I showed them to my grandchildren and they already picked out which cards they want to make with the holographic paper when they are here this summer.  I will start keeping more holographic paper on hand and using it more.  

If you have fun just seeing what you can do, let me know.  If you have questions, let me know as well.  


Monday, May 9, 2022

Circles and Patterns and Good Vibes pages

 For National Scrapbooking day there were 2 different scrapbook kits.  One you make the background with a variety of circles using whole, half, quarter, papers to make circles.  The other paper used the 6x12 flip flaps that really extend the page space you have.  Both are really great.

The Circles and Patterns:


It looks like you have circles all over and then covered them up.  The trick was that under the mats there are no whole circles.  There is an illusion that the circles are everywhere. 

Good Vibes:


The flip flaps can be the exact pattern as where you place them on the page protectors or it can be placed anywhere.  Usually you put the flip flaps so they don't "fall" open when you open the page.  That means that on the left had page they flap to the right and on the right hand page they flap to the left.  I thought it was cute that you actually can use them anywhere on the page.  I have used them at the top and bottom and on the outside of the page protector but you can also use them anywhere - middle was the example. 

You need to know that once you put a flip flap down, it doesn't move. You need to decide that you put it on the page protectors and then you can put other pages in your albums.   

I have tried the Tab Thin cuts Z3983 on the flip flaps so people know there is something underneath to look for. If you do a good job making the flip flaps look like they belong, people don't know to look under them and the tabs help.

Have fun with pages and cards and save your memories.